How to generate a membership NFT collection


How to create an NFT membership pass
Unlike PFP collections, creating an NFT pass or an NFT membership is a lot easier. In this guide, we will learn how to generate the metadata for our collection and finally, how to deploy to Ethereum or other L2 blockchains.
What is an NFT pass and an NFT membership
An NFT pass is a digital token purchased (aka minted) by an individual. When owned, this individual gains access to your platform and unlocks private contents, features and more.
Just like art NFTs, the NFT pass can be traded on marketplaces which grants the owner royalties when traded. An NFT pass can also be soul-bound, meaning that it cannot be traded and can only be owned by the wallet who minted the NFT.
Create the art and metadata
Unlike PFP collections, we already created the art for our pass(es) so we do not need to worry about layering and compatibility.
In this guide, we will create a National Park Pass Collection. Each park will have it’s own pass. As a bonus, we will randomly assigned discount on some passes.
Let's open the Art Generator here
Import the pass(es)
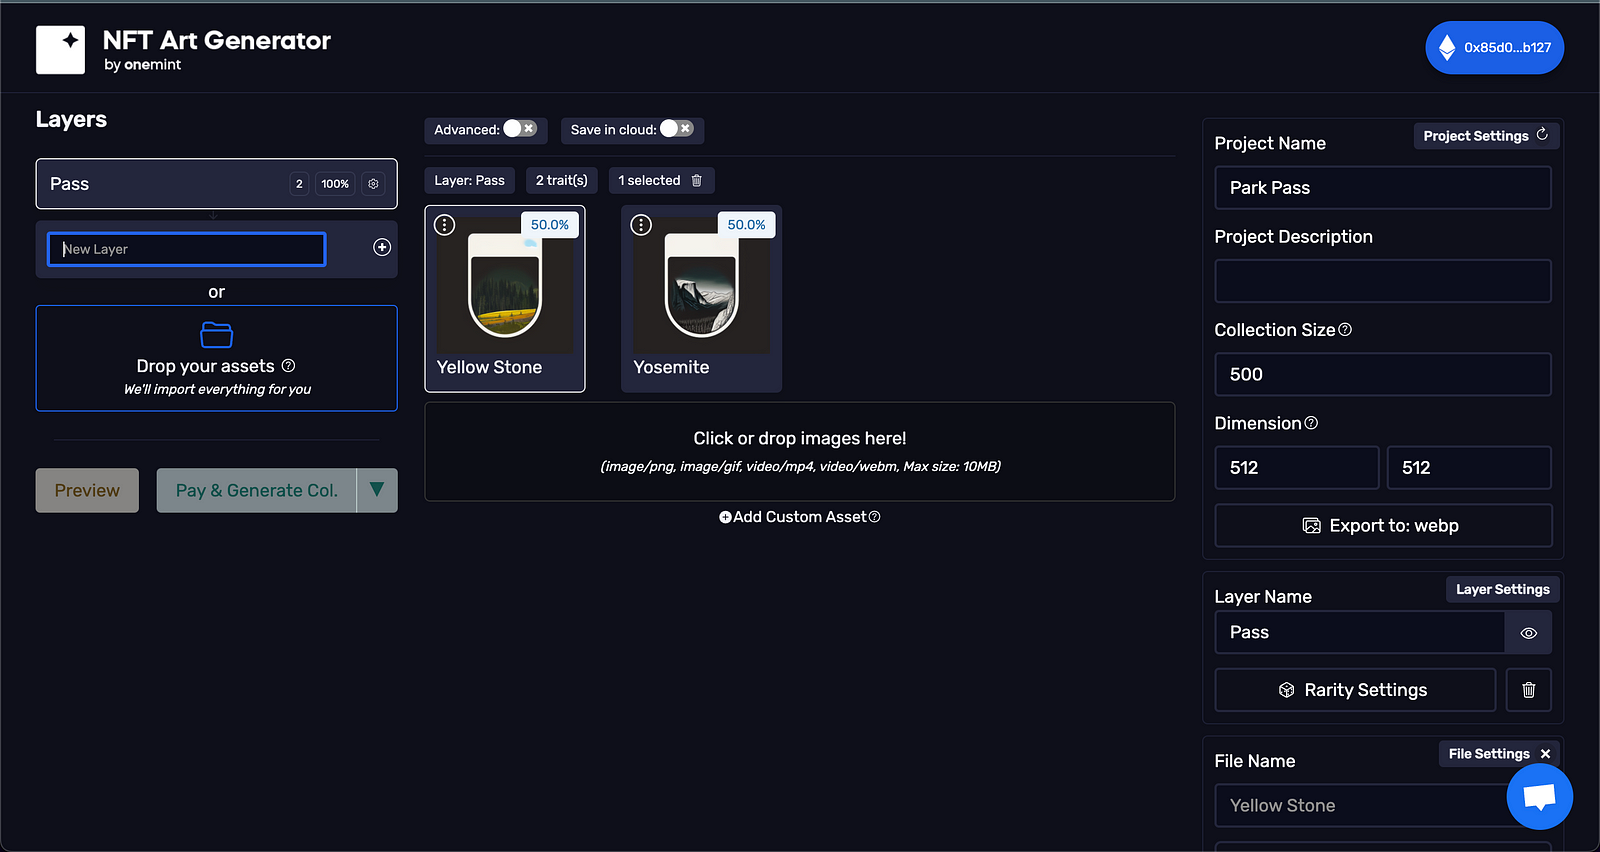
When we open the application for the first time, we should see Background layer pre-created. We will start by renaming this layer to pass and drag our passes (images). Once the images are imported, we will change our collection size to the desired collection size (500).
Configure the rarity
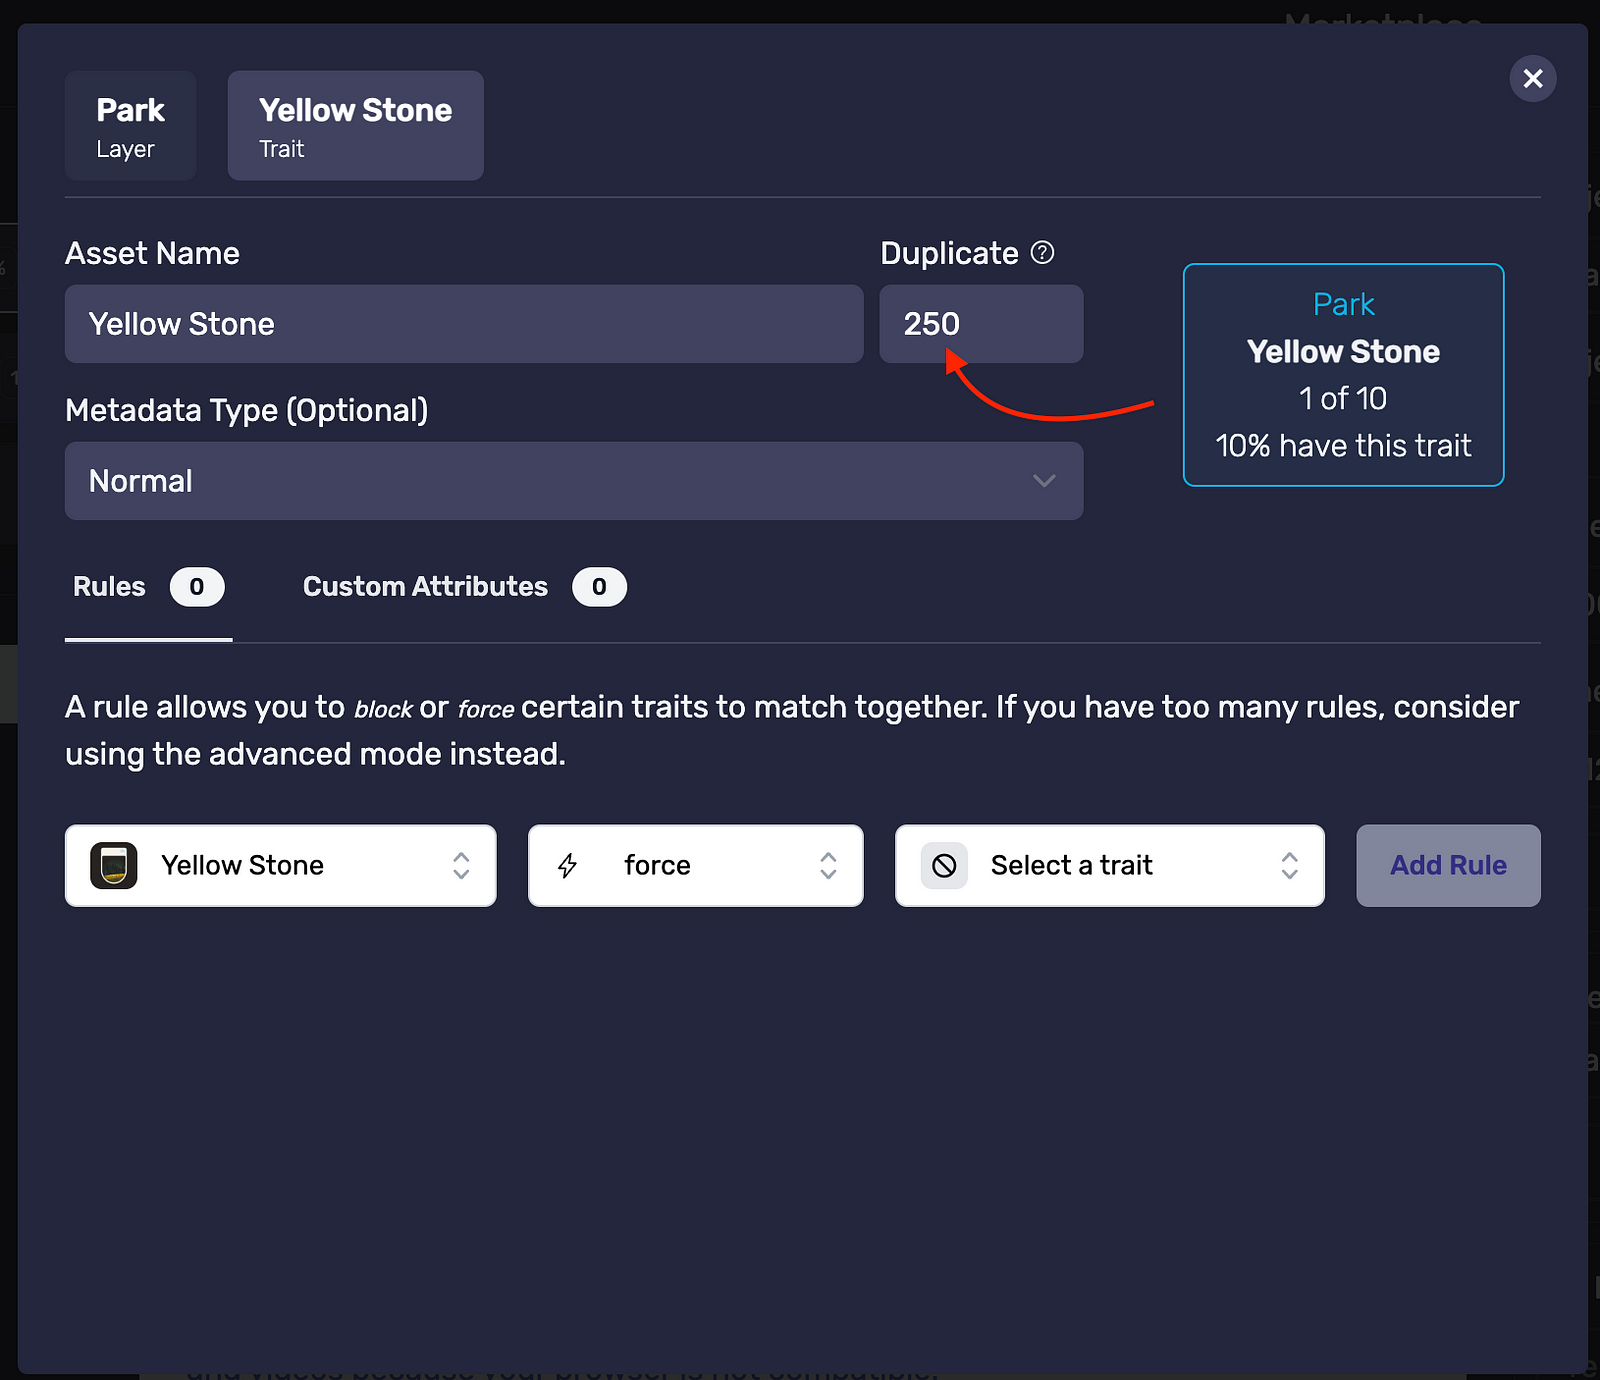
By default, the application will never generate duplicates so we need to change the setting. On each trait, click the edit button. This will open the settings for that trait. Because we have a collection size of 500 and we only have 2 passes, we are going to set the duplicate value to 250 and repeat that process for our other pass.
Generate
We are now ready to generate our NFT pass collection. Click the “Pay & Generate” button to get to the payment page. Head to the account page, the collection will be deployable to Ethereum and other L2 chains as well as Solana.
BONUS: Random discounts
Let’s assign discounts randomly to our collection so wallet owners get extra utility. First, let’s create a second layer names Discount, then click on Add Custom Asset. A custom asset behaves the same as a trait, the only difference it that it does not have an image.
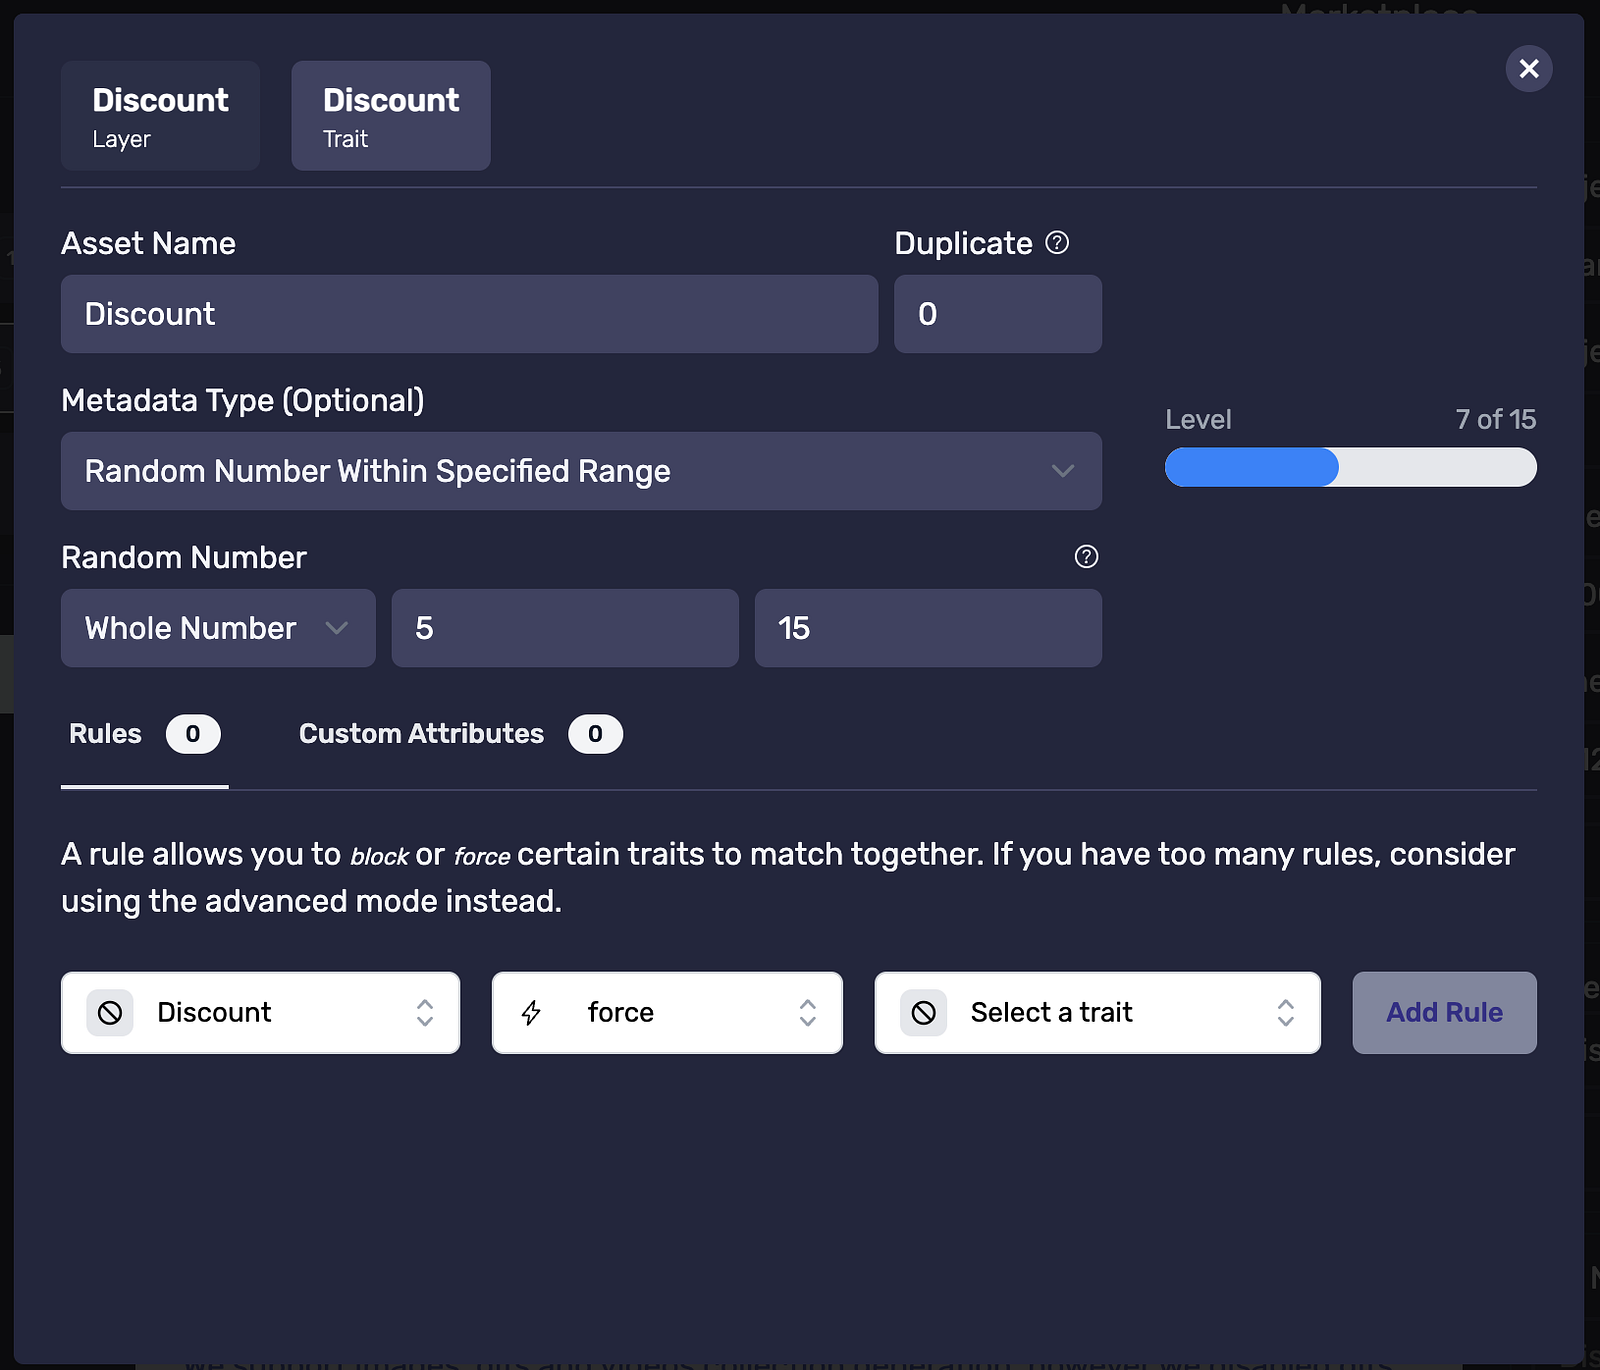
Now, we make assign a 20% rarity to our Discount layer so not all NFT have a discount. Lastly, click on Edit and we will select the Random Number Metadata type. Then we will set a minimum of 5 and a maximum of 15. With those settings, only 20% of NFTs will have a discount, the NFT with a discount will have a discount between 5 and 15.
Last words
With OneMint you can generate your NFT collection as we just did in this guide. But OneMint is also a platform allowing you create dynamic NFTs and have a trait marketplaces with no-code. You can learn more about dynamic NFTs here.